How to Edit STL Files for 3D Printing
After searching the internet to find the best 3D models, you've stumbled upon an STL file that you can't wait to print.
The only problem is that it needs a little modification to fit your needs. So, what do you do?
The answer is simple: edit it!
In today's post, we'll show you how to edit STL files easily, even if you're new to 3D design.

Can You Really Modify STL Files?
Many new makers mistakenly relegate themselves to using pre-made STLs before they learn that STL files can be modified.
But, once they discover how easy it is to edit those STLs using free tools, they gain the confidence to tailor models to their individual needs.
In doing so, they also introduce themselves to the wonderful world of computer-aided design (CAD).
The best way to edit STL files is to choose a CAD program, as these tools provide precise control over geometry, dimensions, and topology. If you already have a working familiarity with CAD concepts, editing will be much easier for you.
But, don't worry, you don't need any previous skills to edit files at the base level. That means tasks like adding extra holes, adjusting certain dimensions, or altering geometry are all fairly simple to pull off.

Step 1: Choose the Right STL File Editors
To edit STL files, it's obvious you'll need an STL file. But what isn't obvious is that you'll need to import that file into some sort of program that allows you to edit it.
You may want to know, "What program can edit STL files?"
Well, there are a vast number of CAD tools on the market today that will allow editing of STL files, and some are better than others.
The choice of which tool to use will depend on your preferences, so try a few to see which one works best for you. Here are just a few STL editing tools you might want to look into:
| Program | Ease of Use | Key Features | Price |
|---|---|---|---|
| FreeCAD | Moderate | Open-source; robust CAD capabilities | Free |
| Tinkercad | Very Easy | Web-based; beginner-friendly | Free |
| Blender | Advanced | Comprehensive 3D modeling suite; high customization | Free |
| MeshLab | Intermediate | Specialized in mesh processing and repair | Free |
| SketchUp | Easy-Moderate | User-friendly; ideal for architectural designs | Free version available |
| MeshMixer | Intermediate | Powerful mesh repair and modification tools | Free |
Tinkercad is one of the easiest tool to edit STL files. Many beginners start with free STL editors such as Tinkercad or FreeCAD because these tools are both powerful and user-friendly.
Advanced users will probably want something with a more comprehensive feature set, such as Autodesk Fusion (formerly Fusion 360) or Blender.
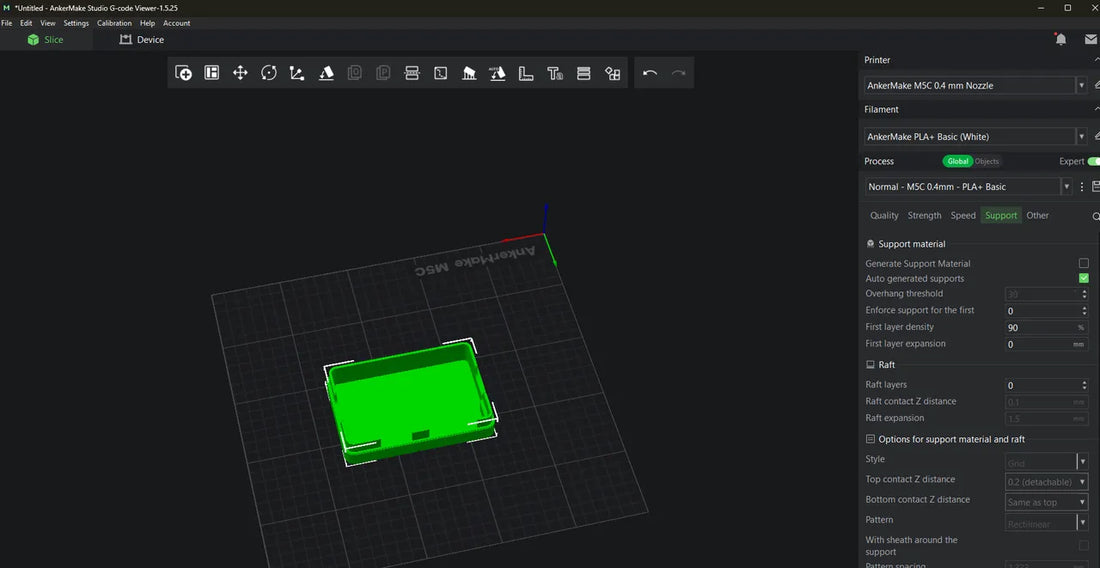
You may also find that your slicing software has a few built-in STL editing features, so make sure you poke around in the menus.
Step 2: Import Your STL File
Now that you've opened your STL file, the next step is to import it into an editing program.
We'll use Tinkercad and Autodesk Fusion as examples to show how the process works in different software.
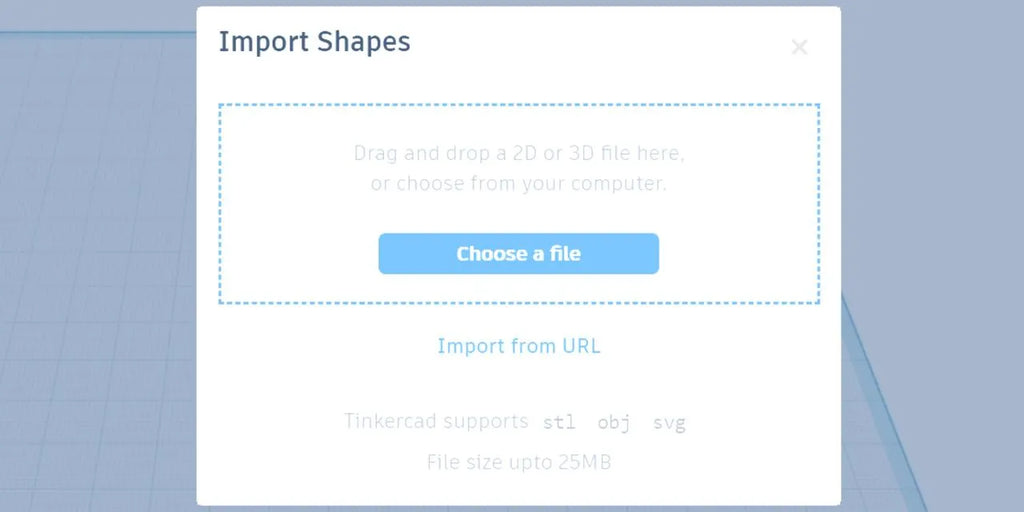
Importing an STL with Tinkercad
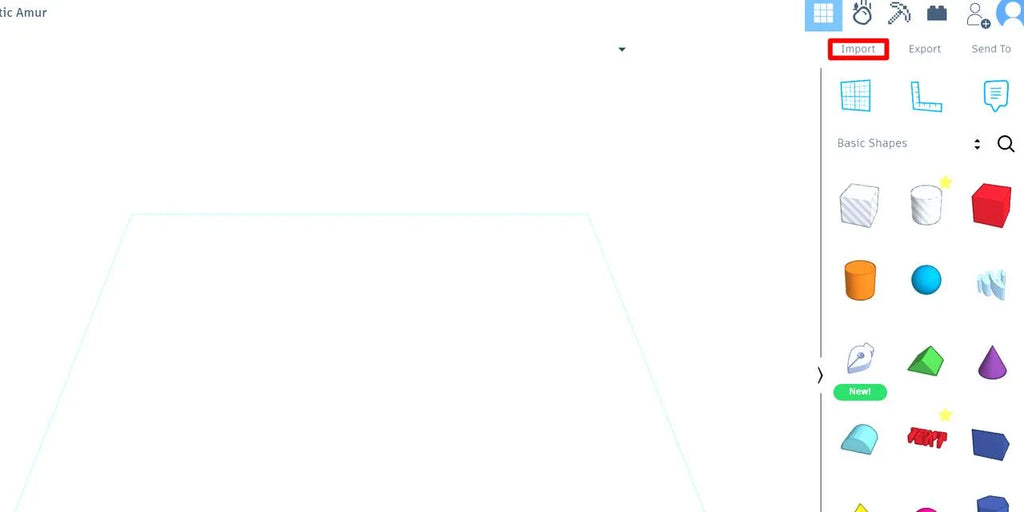
For something like Tinkercad, you can first make a new 3D project, then use the big Import button in the upper-right corner of the primary interface.
This will open a dialogue box that allows you to select an STL file from your computer. Once you've selected the file, you'll need to decide on the measurement parameters before importing will begin.
Importing an STL with Autodesk Fusion
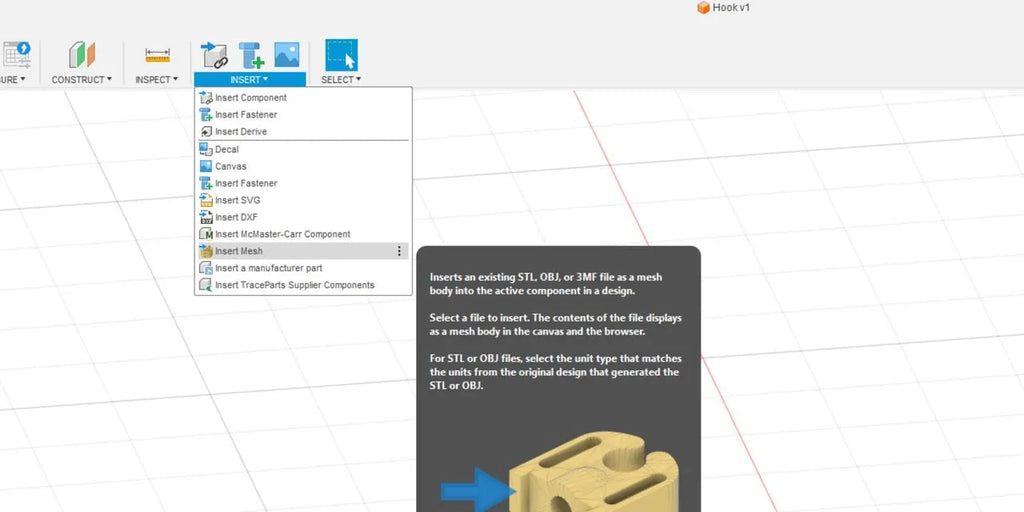
For programs like Fusion, you'll have to open the Insert menu and scroll down to Insert Mesh.... From there, you can select your STL and then adjust the parameters.
Next, you'll select the imported object and click on the Mesh toolbar heading.
From there, click Prepare > Generate Face Groups.

Then, you'll need to modify the object so you can more easily edit. To accomplish that, click Modify in the toolbar, then Convert Mesh.
Finally, using the small pop-up box on the right side of the screen, select your object and set the operation to parametric and the method to prismatic.
Now, it's time to edit!

Step 3: Editing the STL File

Like the choice of editing software, the way you edit your STL will depend on your specific circumstances. Almost universally, editing software has tools to make holes, add squares and rectangles, cut aspects of the model away, and add circular or curved surfaces.
You can also incorporate custom text, like we've done in the example above.
Editing an STL with Tinkercad

With Tinkercad, the process is as simple as selecting a shape from the menu on the right side of the screen, placing that shape in your design, and then altering that shape to fit your needs.
In our example, a pink "L" shape has been added to the hook we imported earlier.
Editing an STL With Fusion

With Fusion, the process is similar. After importing your STL, you'll create a new sketch using the Create Menu, and then extrude that sketch to add or subtract material.
Unfortunately, sketching with Fusion is a bit outside the scope of this tutorial. However, many online guides exist to walk you through the process.
Editing STLs With Other Software
While each STL file editors may differ in execution, most are fairly consistent in methodology. You'll almost always either be adding or subtracting material based on the shape you need to achieve.
It sounds simple, but with complex shapes, it can become difficult unless you have some sort of reference to work from.

Image: Thirdman via Pexels
That's why it's important to use measuring tools such as vernier calipers, micrometers, and radius gauges to record the dimensional characteristics of your desired shape. It also helps to sketch these adjustments on a sheet of graph paper beforehand.
In other words, don't eyeball or "guesstimate" when you're editing. Develop a plan and use that to guide your edits. Doing so will save you a lot of frustration, filament, and time.
Step 4: Exporting the STL File

Our last step in this process will be to export the newly edited STL into our slicing software for printing. The way to do this is similar to importing. Tinkercad has a large button on the main interface that says Export. You should already know what you need to do there.
Fusion, on the other hand, offers the Save as Mesh or 3D Print options, which can also alter the file type of your STL and change it to an .obj, or a .3mf file for additional printing options.

Once you export the file, all that's left to do is print it, and ensure the printed object works the way you intended.
Oh, and don't forget to save your work so you can go back and edit it again later.
It's also important to note that you might need to make a few revisions once you have the physical model in your hands.
One or two rounds of this revision is completely normal, and often you'll discover something after you've printed that you would like to adjust. Just keep your revisions accurately labeled and version controlled, so you can make additional changes later.
Congratulations! Now You Can Edit Any STL
If you've made it this far, you should be proud! You're well on your way to becoming an STL master. Now, you can take any STL you like and alter it to work best for you. And you can see how this opens up massive possibilities for creating unique prints.
Unfortunately, 3D prints aren't always one-size-fits-all. But that fact shouldn't limit your print capabilities. Once you learn how to edit STL files, you'll be doing so regularly. That's because STL editing lets you craft custom 3D prints that are unique and made just for you.
Until next time, happy printing!