What is Auto Leveling 3D Printer? All You Should Know
3D printing has completely changed the way we make prototypes, custom designs, and functional parts. This technology is used in many industries, from manufacturing to healthcare.But for anyone who has used 3D printing, there's a basic challenge: making the print bed level.
In this article, we will explain what an auto leveling 3D printer is, the best auto leveling 3D printer, and whether you can still level the bed manually when needed.Let's explore the world of 3D printing and see how technology is making the process more efficient and user-friendly.

What Does Auto Leveling Do On a 3d Printer?
Automatic leveling on a 3D printer is a very helpful feature that makes printing easier and better. It ensures that the print bed is perfectly level before the printing process begins. This is important because a level bed helps the first layer of the print adhere well and provides a good foundation for the rest of the print.
The printer uses sensors to check the height of the bed at various points. If it detects any unevenness, it adjusts the height of the nozzle to keep everything even. This means you don't have to spend time and effort leveling the bed by hand, which can be difficult and frustrating, especially for beginners.
When the bed is level, the print quality improves. An uneven print bed can lead to problems such as the print not adhering properly, warping or even failing completely. Automatic leveling helps to avoid these problems, resulting in smoother and more accurate prints.
This feature also reduces the risk of printing errors and saves you time and filament. For newcomers to 3D printing, automatic leveling makes the process easier.
Best Auto Leveling 3D Printer: AnkerMake M5
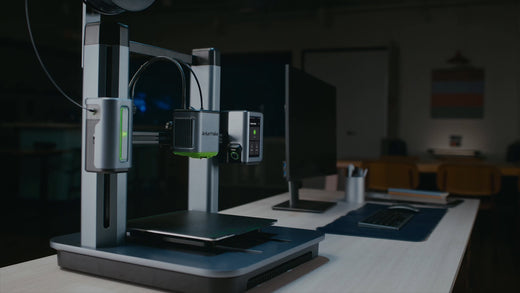
The AnkerMake M5 3D Printer is a great choice for anyone looking to get into 3D printing or upgrade their current setup. One of its best features is the 7×7 Auto-Leveling system. This system uses sensors to check the height of the print bed at different points and automatically adjusts it to make sure it's perfectly level. This is especially helpful for beginners because it takes away the hassle of leveling the bed by hand.
The AnkerMake M5 also prints quickly, with a speed of 500 mm/s, and it can print with a high level of detail, down to 0.1 mm. It has a built-in AI Camera that lets you watch your print in real-time, so you can catch any problems early. You can also control your prints and adjust settings easily using the AnkerMake App and AnkerMake Slicer.
The printer is easy to use and built to last, thanks to its strong Aluminum Alloy frame. With the AnkerMake M5, you get a reliable and high-performing 3D printer that makes the printing process smoother and more enjoyable.
Whether you're new to 3D printing or have some experience, the AnkerMake M5 is designed to meet your needs and help you create great prints.

Can You Level the Bed Manually?
You can level your 3D printer's bed manually. This is often necessary for models that don't have auto-leveling features. Here's a detailed guide on how to do it:
First, clean the bed of the printer with isopropyl alcohol. This step is crucial because it removes any dust, debris, or leftover filament that could interfere with the leveling process.
Next, preheat the bed to the temperature you plan to use for printing. For example, if you are printing with PLA, set the bed temperature to between 50 and 60 degrees Celsius. This is important because the bed can expand a little when heated, and you want to account for this expansion during the leveling process.
After you preheat the bed, turn off the stepper motors. You can usually do this through the printer's control panel or software. Disabling the motors allows you to move the print head and bed manually without causing any strain or damage to the motors.
Next, adjust the initial height at each corner of the bed. Move the print head to one corner and place a standard sheet of paper between the nozzle and the bed. Gradually raise the bed until you feel a slight resistance when moving the paper. This means the nozzle is at the right distance from the bed. Repeat this process for all four corners. If the nozzle is already at the right height in a particular corner, no adjustment is needed there.
To make sure the bed is level, print a set of calibration squares. You can make these squares yourself or download them from the internet. Print the squares on your bed, then carefully look at them with a precise measuring tool. Look for signs that the nozzle was too high or too low, like uneven layers or poor adhesion.
Based on your examination of the printed squares, make small adjustments to the bed height at each corner. You may need to repeat this step a few times to get the bed level. This step is often repeated, and it's normal to go through a few cycles of printing and adjusting to get it just right.
By following these steps, you can manually level your 3D printer bed, ensuring better print quality and reducing the chances of print failures.
What is the Difference Between Manual and Auto Bed Leveling?
Manual bed leveling requires you to adjust the bed height yourself by moving the print head to different points and using a piece of paper or feeler gauge to measure the distance between the nozzle and the bed. This process can be time-consuming and prone to human error.
Auto bed leveling uses sensors to automatically measure the height of the bed at various points and adjust the bed or nozzle height to ensure a consistent distance across the entire bed. This method is quicker, more accurate, and reduces the chances of errors, making it easier and more reliable, especially for beginners.
Conclusion
In short, auto leveling is a key feature that makes 3D printing more reliable, easier, and produces better results. It ensures your prints start off right, leading to a more enjoyable and successful printing experience.
FAQs about Auto Leveling 3D Printer
Do I have to level my 3D printer after every print?
It's not necessary to level your 3D printer after each print, but it's a good idea to check the bed from time to time. Factors like printer quality, how often you use it, or if the printer has been moved can affect the bed level. If you start noticing issues with the first layer, such as poor adhesion or uneven printing, it's time to re-level.
When should I re-level my 3D printer?
Re-leveling is needed if you're seeing problems like a bad first layer or poor adhesion. It's also a good idea to re-level after moving your printer, changing filaments, or after a long print. If it’s been a while since the last leveling, a quick check can help prevent print quality issues. Regular maintenance keeps things running smoothly.