How to Print Your Own 3D Printed Lithophanes
Lithophanes are one of the most unique and mesmerizing applications of 3D printing.
These prints transform simple images into stunning works of art when illuminated from behind. Whether you're creating a custom gift, a decorative piece, or experimenting with light and shadow, lithophanes are a fantastic project to try with your 3D printer.
In this guide, we'll explore how you can create your own lithophanes from start to finish.
What is a Lithophane?
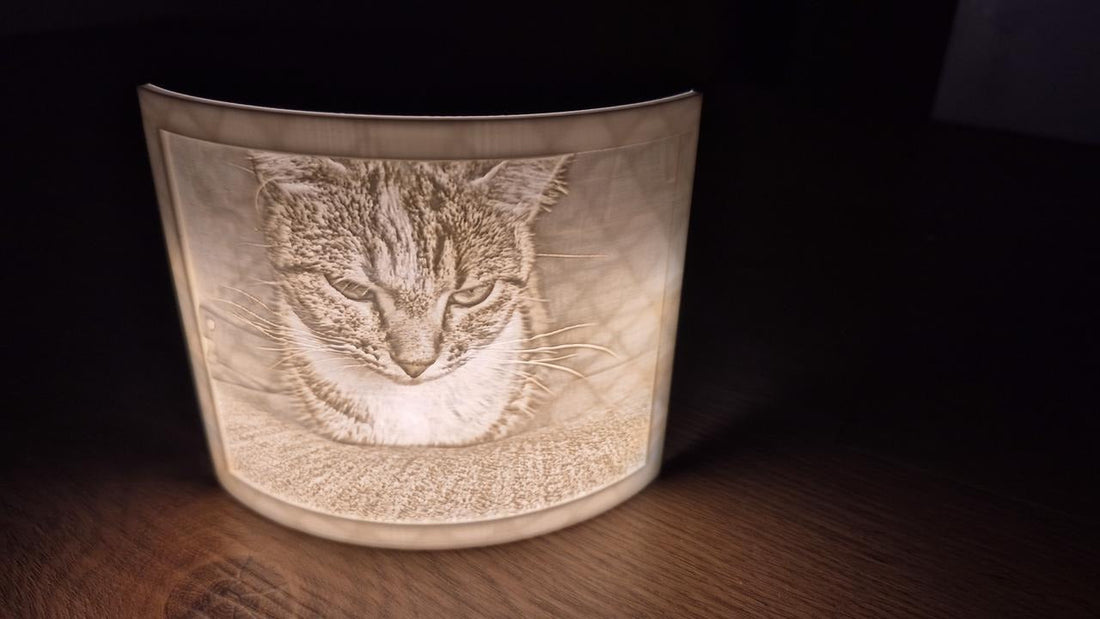
Lithophanes are thin pieces of material with varying thicknesses that, under normal lighting, appear as little more than a textured surface. However, when illuminated from behind, they reveal a hidden image with surprising levels of detail.

History of Lithophanes
The use of lithophanes is not a new technique. The European method most similar to modern lithophanes was invented by Frenchman Baron Paul de Bourgoing, who patented it in 1827. At the time, porcelain was the primary material of choice.
Thankfully, times have changed, and now creating your own stunning lithophanes is easy with a 3D printer and free-to-use online tools.
How to Get Started with 3D Printing Lithophanes
To get started with 3D printing lithophanes, it's important to focus on a few key factors. The right filament, a high-quality image, and a proper light source can make all the difference in your final print.
Choosing the Right Filament for Lithophanes
Lithophanes can be printed in any color or type of filament, but lighter shades such as white or pastels will produce far superior results. It's also worth experimenting with different filament finishes, such as matte or glossy, to see what works best.

Image Quality and Contrast
A high-quality image is crucial. Images with strong contrast between the subject and background tend to create better results. One way to improve this is to convert your image to grayscale and increase its contrast using a photo editor of your choice.
The Importance of a Light Source
The final and arguably most important element is a light source. You can simply hold your lithophane up to a lightbulb or sunlight (PSA: do not look directly at the sun!).
Alternatively, there are kits with LED backlights, such as this one, which can be mounted inside a photo frame. If you choose this option, ensure your lithophane is scaled appropriately to fit your light panel or frame.
Another fantastic gift idea is a lithophane light box. You can create one using this tool, which allows you to specify the size of the light bulb socket, reducing the effort required to achieve the perfect result.
Print Settings for Best Results
For best results, print lithophanes with a slow speed (around 30-40mm/s) and a high number of walls (4-6). A low layer height, such as 0.1mm or lower, will enhance detail. Avoid using infill-lithophanes should be printed with 100% solid layers to maintain their structural integrity and light diffusion. (example shows how infill can ruin the effect)

Customization
If you want to fine-tune your lithophane beyond what online generators offer, tools like Blender or FreeCAD might be exactly what you need.
Tips & Tricks for 3D Printing Lithophanes
Try different images, as some simply don't translate well into lithophanes.
Experiment with contrast adjustments in your images to improve the final result.
For highly detailed images, consider using a 0.2mm nozzle and reducing your layer height to 0.05mm - 0.10mm. This allows for greater light transmission, enhancing detail.
Filament types-and even different brands-vary in translucency, affecting the final appearance. For consistent results, avoid mixing different filaments in a single lithophane project.
Common Mistakes to Avoid
- Printing too fast: High speeds can introduce inconsistencies in the layers, reducing the clarity of the image.
- Using dark or opaque filaments: These block too much light, making the lithophane ineffective. Stick to white or lightly tinted filaments.
- Not orienting the print correctly: For best quality, print lithophanes in an upright (vertical) position rather than lying flat, which helps preserve details.
Creative Applications
Lithophanes aren't just limited to photo frames or light boxes. You can also incorporate them into lampshades, nightlights, holiday ornaments, or even curved surfaces like cylindrical lithophanes for custom lanterns. With innovative thinking, the possibilities of what you can create with this technique are truly breathtaking.
Hopefully, this introduction to lithophanes has been illuminating. Puns aside, if you follow the tips in this guide, you'll be well on your way to creating stunning lithophanes that will impress anyone who sees them and leave them wondering how you achieved such incredible results.