How to Use a 3D Printer: Simple Steps to Your First Print
You might think that 3D printing is difficult, but it's easier than you imagine.
In this guide, we will help you to use a 3D printer step by step. By the end, you'll be ready to make your first 3D object.
Let's get started!
What Do You Need to Run a 3D Printer
-
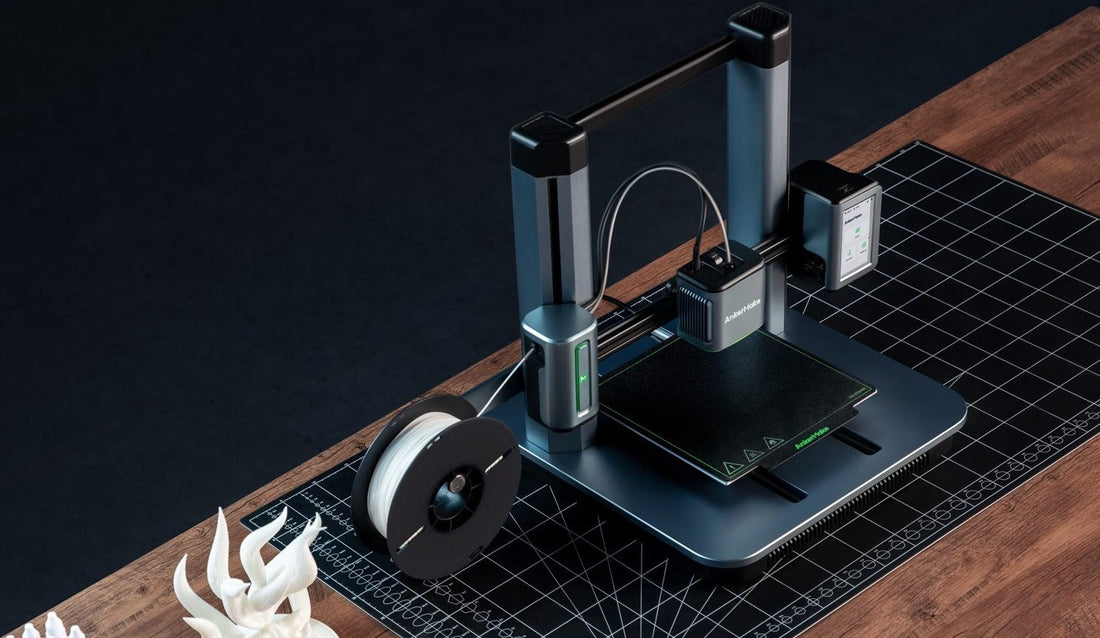
A 3D Printer. This goes without saying, but choosing a good 3D printer isn't easy-make sure it suits your needs.
-
Filament. PLA is the best choice for beginners-it's easy to use and comes in lots of colors.
-
A 3D Model. Pick or create a design you want to print.
-
3D Printing Software. A slicer software is needed to edit STL files. If your printer supports remote printing, you may need specific software to send print jobs.
-
A Computer or Phone: A computer offers more options, but a phone is more convenient if your printer supports it.
-
Basic Tools: A spatula (to remove prints), needle-nose pliers (to remove supports), and sandpaper (optional, to smooth edges) are handy to have.
How to Use a 3D Printer: Step by Step
Step 1: Set up your printer
Let's begin by unboxing the printer and placing it on a sturdy, flat surface. Many printers come partially assembled, so you just need to follow the manual to attach any loose parts like the printing bed or filament holder.
Once everything is in place, plug in the power cord and turn on the printer. When the screen or buttons light up, it's ready to go!
Step 2: Choose or Design a 3D Model
Before printing, we first need to get a 3D model. You can create a 3D model using 3D modeling software or download a 3D print file from websites such as Thingiverse, Printables, and Make it Real.
Then, save your selected or created model as an .STL file, this is the file type most printers use.

Step 3: Prepare the File
Now, it's time to use slicer software. This software acts as the bridge between a 3D model and the printer. Open your .STL file, and the software will "slice" the model into layers that the printer can understand.
Next, adjust a few settings to convert the STL file into G-code:
-
Choose the material
-
Set the nozzle temperature
-
Set the bed temperature
-
Pick a layer height
AnkerMake Studio includes fast, normal, and precision modes to help you get started quickly.
Step 4: Level the Print Bed
Bed leveling is super important. If the bed isn't level, your print won't stick.
To manually level your 3D printer, heat the nozzle and bed, then adjust the bed screws until the paper slides with slight resistance at all points. Check all corners and the center. Done!
Manual leveling may be complex, so we recommend using a 3D printer with an auto-leveling feature, like the AnkerMake M5.
{{ component: "product", handle: "m5", sku: "V81111C1"}}
Step 5: Load the Filament
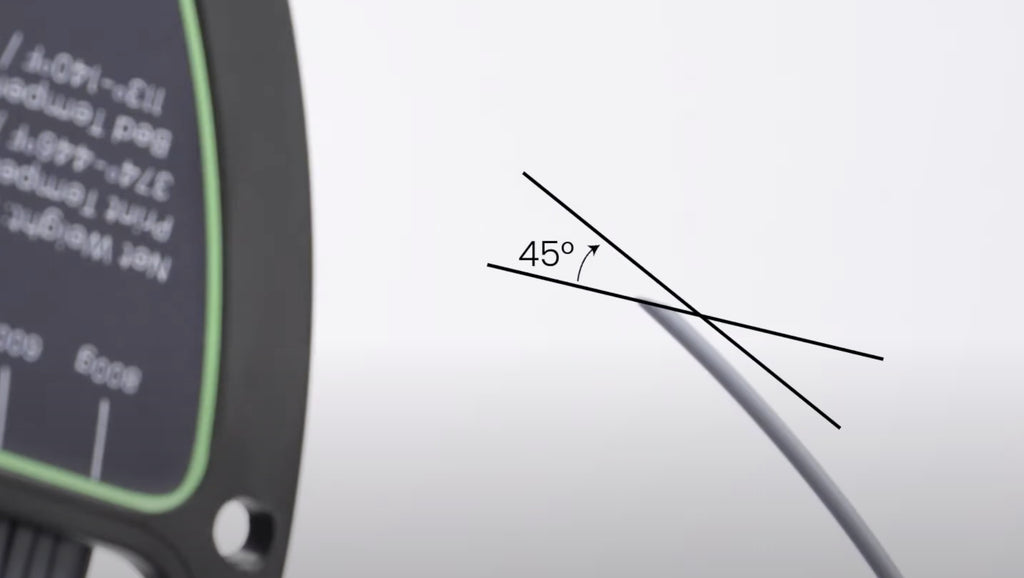
Filament is the plastic you'll print with. Place it on the holder, trim the tip, and insert it until it reaches the extruder.
Then, press the extruder button while inserting the filament, stopping when you feel resistance.
Printers may vary, so check your printer's manual for instructions.
Step 6: Start the 3D Print
Now it's time to print! Insert the SD card or USB, or use the remote printing feature if your printer has it.
Many newer printers, like AnkerMake M5, let you start and monitor prints from your phone or computer.
Just upload the file to the app, tap print, and you're good to go. You can even check progress or get notifications when it's done-perfect for when you're busy or not at home.
This process can take hours, so patience is key.

Step 7: Remove and Clean the Print
When the printing is finished, wait for everything to cool down. Then, carefully pry the object off the bed using a thin spatula or scraper.
Some prints have thin plastic supports (like scaffolding) that hold the shape during printing-remove these by snapping them off with pliers or cutting them with a hobby knife.
For a smoother result, sand down any rough edges with fine sandpaper.
Learn More: How to Smooth PLA 3D Prints?
Are 3D Printers Difficult to Learn?
3D printers aren't hard to learn, but it takes some time to get used to them, especially if you're new to it. Once you've figured out how to set up the printer, prepare the files, and use the materials, it becomes much easier. Many 3D printers these days have user-friendly features and helpful guides to make the process even smoother.
Final Thoughts
That's it! With these basics, you're ready to start creating. With a little practice, you'll be making all sorts of cool things. As you get more comfortable, try new materials or upgrade your printer with accessories. Happy printing!