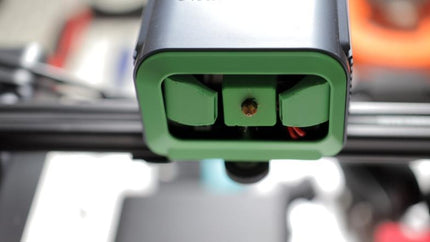
How to Clean 3D Printer Nozzle
Share
If you’re noticing filament buildup on your 3D printer’s nozzle or strange artifacts in your prints, a thorough nozzle cleaning can restore print quality.
This easy, 10-minute guide will walk you through each step to clean your 3D printer nozzle safely and effectively.
What You'll Need

-
Isopropyl Alcohol
-
A 0.4mm Nozzle Cleaning Needle
-
Paper Towels or a spare cloth
-
A brass bristled brush/old toothbrush
-
Gloves that can handle high temps
Step 1: Removing Loose Debris

The first thing you'll want to do is turn your printer on, home the print head, and then lift it to the topmost position. This will make it easier for us to access the nozzle.
Once the nozzle is at the top position, use a tiny bit of isopropyl alcohol and slightly moisten the bristles of your brass brush. A few drops is more than enough.
Then gently scrub the nozzle with the brass brush to knock away any loose debris that is caked onto the nozzle.

No need to scrub hard here. A couple of quick swipes is enough to get anything off before we start heating the nozzle. If you don't have a brass brush, then a bit of alcohol on a paper towel, an old toothbrush, or an alcohol prep pad can also work.
Also, ensure you wipe the nozzle dry with a paper towel before moving on to the next step. Isopropyl alcohol is flammable, so we would rather not proceed until we're sure the nozzle is dry.
Step 2. Removing The Filament & Heating The Nozzle

This is a good time to put on your gloves. The next step will be to heat the nozzle to operating temperature. That way we can remove the filament and soften up any remaining plastic that may be stuck to the nozzle.
Using the printer's controls, heat the nozzle to around 200C, and retract the filament until it is removed from the machine. If any filament oozes at this time, you'll want to wipe it away. A few additional brass brush swipes can also loosen any remaining stuff caked onto the nozzle.

Don't use a toothbrush for this, as the higher temps can melt the bristles. Once the outside of the nozzle is clean, we'll move onto the filament path.
Step 3: Clearing The Filament Path

While the nozzle is still hot, insert the 0.4 mm needle into it to ensure there are no blockages. It's best to insert the needle, then remove it and wipe it off with a paper towel. Doing this several times will clear any remaining funk in the filament path. Just be careful, those needles are sharp, and they can hurt if you poke yourself. Also, don't burn your fingers.
It's important to emphasize that you must use the correct 0.4mm needle here. Don't just raid the sewing kit and hope for the best--doing so can damage your nozzle and affect your print quality.
Step 4: Brush Again

After you've cleaned the nozzle using the needle, you'll want to do one final swipe with your brush to clear any extra debris that stuck to the nozzle during the last step. Using your brash brush, give the nozzle a few swipes until there is no visible plastic debris.
No need to use any alcohol here, the dry brush should be just fine. As you do this, you may notice small pieces of filament or brass falling onto the build plate. Be sure to clean these up after the process is finished. Once the nozzle looks like it's clean, you're done.
Step 5: Reinstall Filament

The hard part is done. If you did everything right, the nozzle should be looking much cleaner. Now all that's left is to reinstall your filament. Cut the end of the filament at a slight angle with a pair of side cutters. Then reinsert it.
Use the extrude function to pass some filament through the nozzle. Do this a few times as any additional debris that you knocked loose will be pushed through the nozzle and through the filament path. The filament should extrude in a thin, smooth strand.
Enjoy Your Freshly Cleaned Nozzle
That's it! You've done it. Now you have a clean nozzle that will continue to print like new again. Easy, right?
Feel free to use this guide any time you see buildup on the nozzle, or you start noticing unexpected artifacts in your print surfaces. I also find that once-a-month cleaning helps keep my prints looking great.
Did you find this info helpful? We want to hear from you. If so, leave us a comment and let us know. If not, leave us a comment and tell us where we went wrong.
Happy Printing!